Getting Started

Platelight Installation - Lian Li

Step-by-step instruction video
How to Swap Platelights
We'll walk you through installing your platelight acrylics.
Step 1: Remove Back Panel
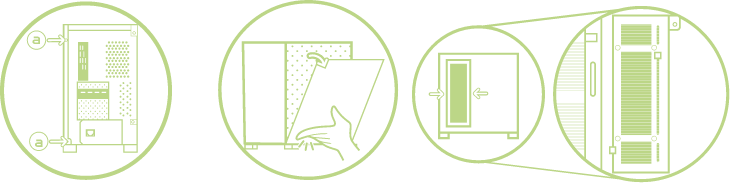
Remove the rear panel of your case by removing the screws indicated (1a) then hinge it away from the case and lift. Locate the rear of your Plate Light on the left hand side of the back of your case.
Step 2: Prepare Platelight
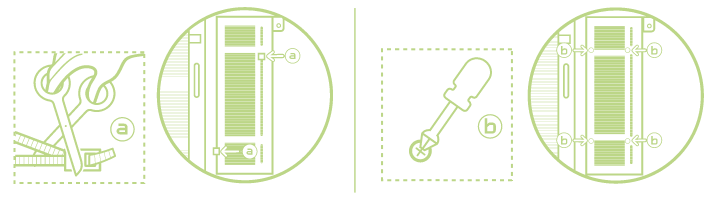
Find the zip ties that hold your Plate Light in place. Cut and remove them. They should be found in the top right and bottom left corner of the lightbox. (2a,2b) Do not cut any wires in the rear of your case.
If you are struggling to remove the zip ties after they are cut, slightly loosen the
mounting-screws nearest them. When each is halfway undone, removing the cut zip ties should be much easier. Once zip ties are cut retighten the screws.
STEP 3: Swap Platelight Insert
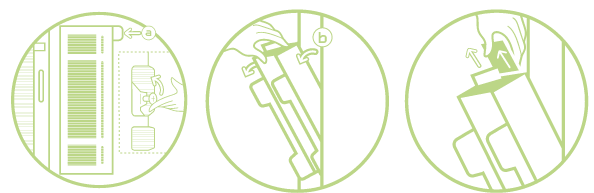
In the top right-hand corner of the Plate Light there will be a lever (3a) that allows it to swing back. Push this up and pull on the rear of the plate light (3b).
Open the top of the Plate Light and slide the insert up and out of the frame. Replace your desired acrylic into the frame and close the top. Push forward until you hear a click and your Plate Light should be firmly back in place. Return your rear panel and enjoy your new acrylic!
Need Additional Support?
We're here to help.


